# 신규 설치

{% hint style="info" %}
대리점 웹 시스템에서 등록할 수 있습니다.

**매장 등록** 후 **설치의뢰**를 하지 않으면 설치리스트에 나오지 않습니다.

**설치의뢰 후** POS에서 프로그램 실행 후 로그인 하세요.

POS 1대 당 인증 1 COPY 소모됩니다. &#x20;
{% endhint %}

{% hint style="warning" %}
포스와 키오스크 동일한 설치과정을 거칩니다.

키오스크 사용을 위해서 사전에 사용신청 먼저 진행해주세요.

\=> [1. 키오스크 사용 신청](/android-pos-manual/android-kiosk/request.md)
{% endhint %}

{% tabs %}
{% tab title="설치 의뢰" %}

1. ASP에 대리점 계정으로 로그인해주세요.
2. **시스템관리** -> **POS버전관리** -> **설치관리** 로 이동해주세요.<br>

   <figure><img src="/files/eNGR5IRaSUqMrrB5B1dW" alt=""><figcaption><p>설치관리</p></figcaption></figure>
3. 오른쪽 **설치의뢰**를 눌러주세요.<br>

   <figure><img src="/files/cnAWZK7yDFbKUDJozgMV" alt=""><figcaption></figcaption></figure>
4. **매장명** 또는 **매장코드**를 넣어 조회하세요.
5. 설치할 매장을 선택 후 설치사유를 **신규설치**로 선택하고 **저장**해주세요.<br>

   <figure><img src="/files/81PqGtws7tSi3TAhtc5v" alt=""><figcaption></figcaption></figure>
6. 설치관리에서 매장조회 시 설치구분이 **설치대기중** 으로 나오면 준비가 완료된 것입니다. <br>

   <figure><img src="/files/eHFG5Qdc53CPdkFSVCHD" alt=""><figcaption></figcaption></figure>

{% endtab %}

{% tab title="POS 설치" %}
{% hint style="info" %}
설치 의뢰 완료 후, **설치하려는 POS에서 진행**하세요.
{% endhint %}

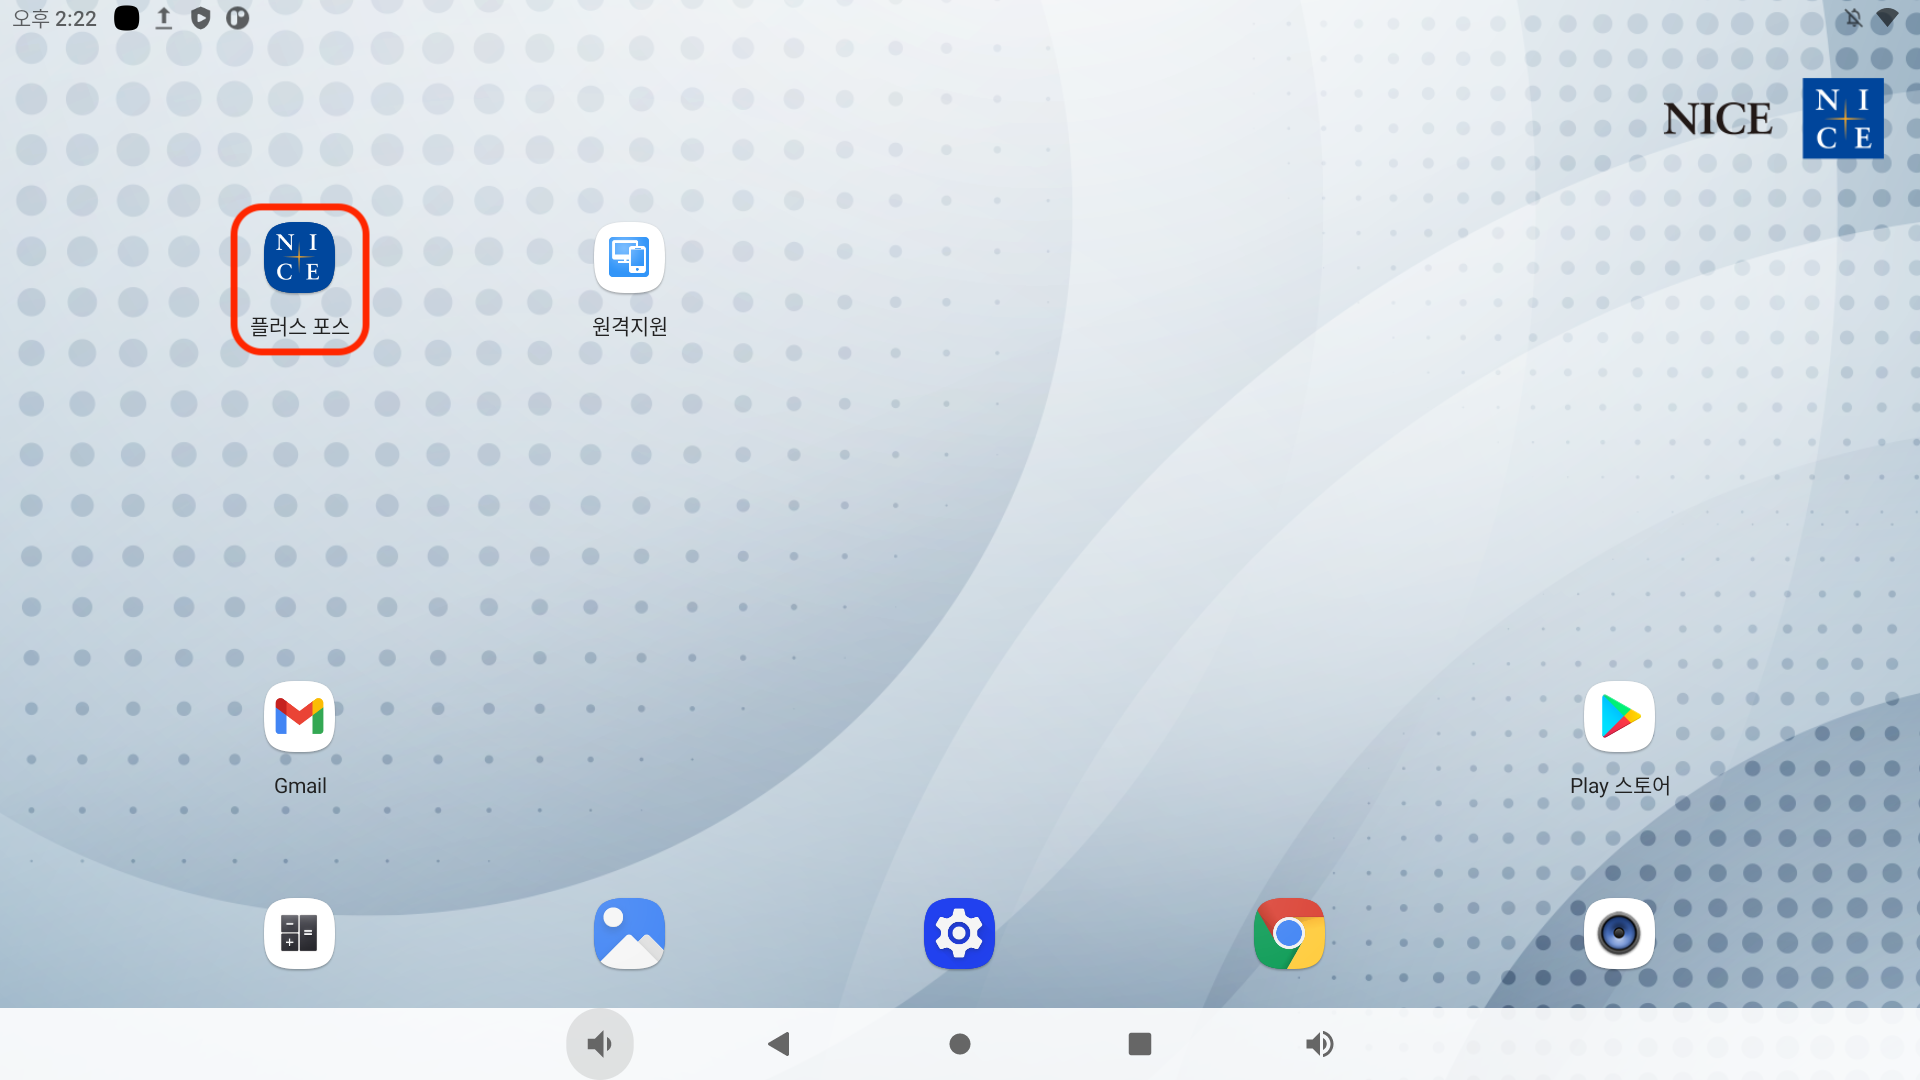
1. 포스 전원을 켜면 기본적으로 **플러스 오더 프로그램**이 설치되어있습니다.<br>

   <figure><img src="/files/dq0VfAW7ZBdaWFfZFq8h" alt=""><figcaption></figcaption></figure>
2.
3. \[**플러스 포스]**&#xC544;이콘을 터치하여 프로그램을 실행시켜 주세요. <br>

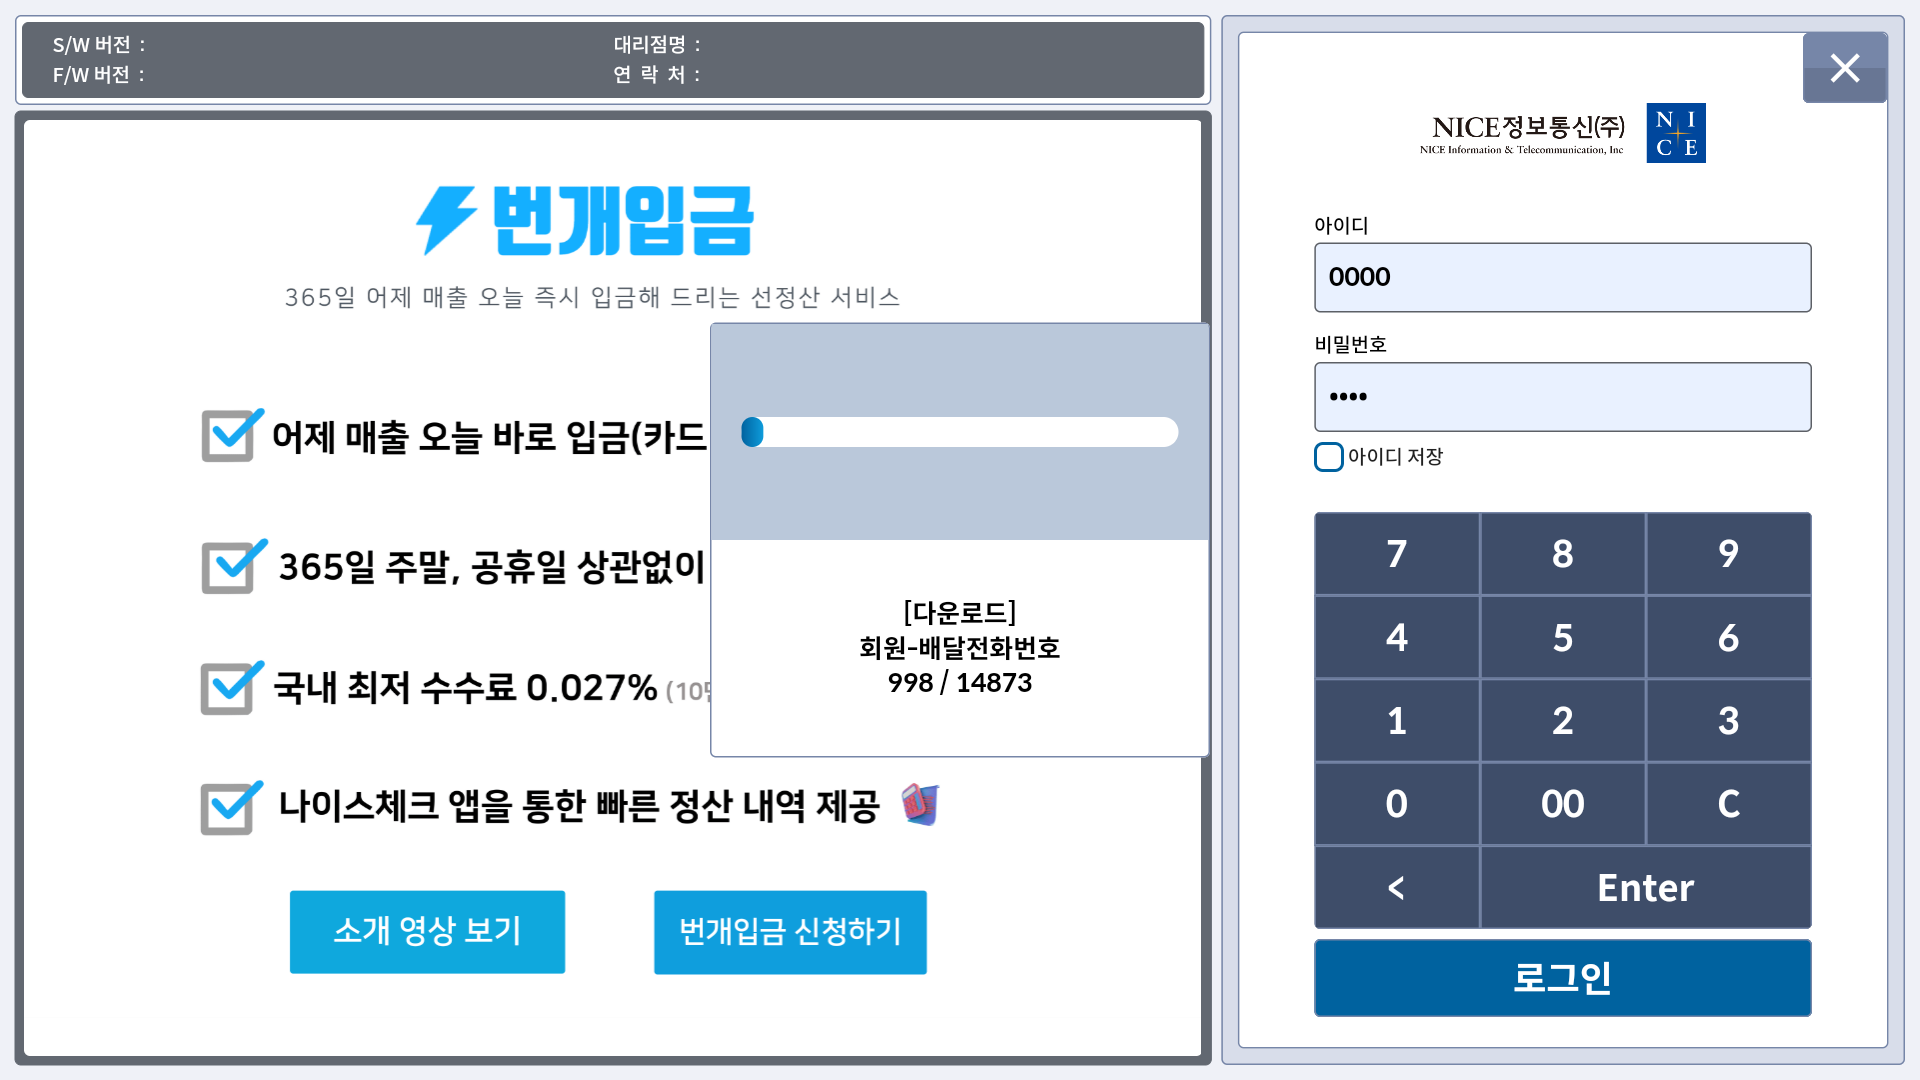
   <figure><img src="/files/JrcAylKMLEhNMvTMfS8R" alt=""><figcaption><p>앱 실행 시 첫화면</p></figcaption></figure>
4. 터치하여 실행 후 대리점용 ID / PW 로그인해주세요.\ <br>

   <figure><img src="/files/niSbiBlP7nk6LJkRDAgJ" alt=""><figcaption></figcaption></figure>
5. 로그인 후 **일반용** 매장리스트를 찾아 선택 후 확인을 눌러주세요. \
   &#x20;<mark style="color:red;">**※ 설치의뢰를  하지 않으면 매장리스트에 나타나지 않습니다.**</mark>

   <figure><img src="/files/31ZXSXKyfP5SeFMeEjBC" alt=""><figcaption></figcaption></figure>
6. 설치 정보를 입력합니다. \
   \
   5-1.   사용하려는 **포스가&#x20;**<mark style="color:red;">**메인포스**</mark>**라면 로컬 서버명에 \[localhost] 입력**합니다.   \
   서버구분은 **메인포스의 운영체제와 동일한 것을 선택**합니다.&#x20;

   <figure><img src="/files/ln1a1cfYBmPzhoxmdX3o" alt=""><figcaption></figcaption></figure>

   5-2. 사용하려는 포스가 <mark style="color:red;">**서브포스**</mark>**라면 로컬 서버명을  메인포스의 IP로  변경**합니다.\
   서버구분은 **메인포스의 운영체제와 동일한 것을 선택**합니다.&#x20;

   <figure><img src="/files/XqIRwHNnxTbnGvyqfnjk" alt=""><figcaption></figcaption></figure>

   5-3. 메인포스 설정과 서브포스 설정 과정은 아래 링크를 참고해주세요. <br>
7. 확인을 누릅니다.
8. 최신버전으로 업데이트 되며, 매장 정보를 ASP에서 다운로드합니다.<br>

   <figure><img src="/files/XqHnehkqZAQCROcCFqHM" alt=""><figcaption><p>버전 확인</p></figcaption></figure>

   <figure><img src="/files/FkrWl6JXo5P1EoCLtNCA" alt=""><figcaption><p><br>프로그램 업데이트</p></figcaption></figure>

   <figure><img src="/files/PrEA3zBCm3OHa4DWZHwX" alt=""><figcaption></figcaption></figure>
9. 설치가 완료되었습니다.
   {% endtab %}
   {% endtabs %}


---

# Agent Instructions: Querying This Documentation

If you need additional information that is not directly available in this page, you can query the documentation dynamically by asking a question.

Perform an HTTP GET request on the current page URL with the `ask` query parameter:

```
GET https://pluspos.gitbook.io/android-pos-manual/android-pos/setup/new.md?ask=<question>
```

The question should be specific, self-contained, and written in natural language.
The response will contain a direct answer to the question and relevant excerpts and sources from the documentation.

Use this mechanism when the answer is not explicitly present in the current page, you need clarification or additional context, or you want to retrieve related documentation sections.